Manually Configure a Product Using the Configurator
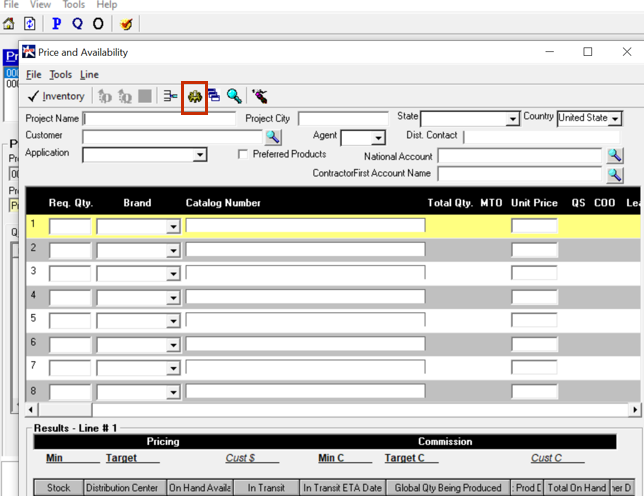
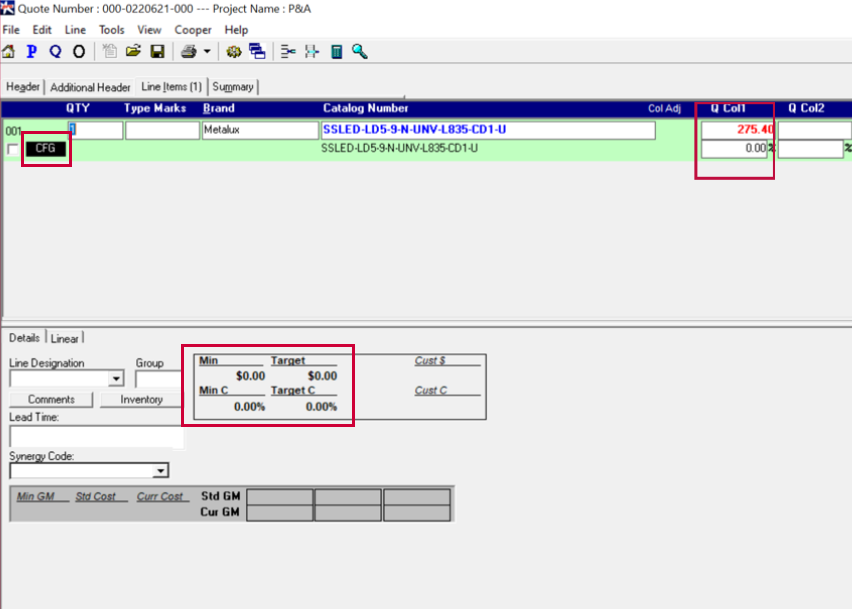
Step 1: Open any sales instrument and click on the Configurator icon.
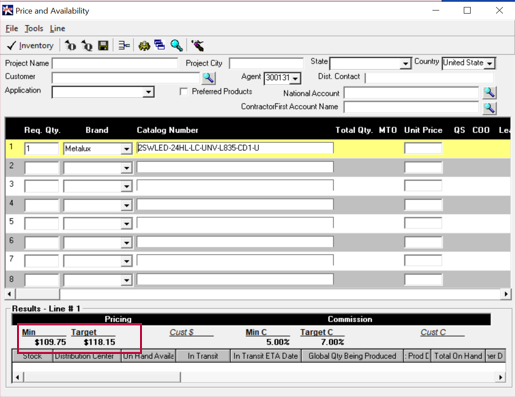
Configurator from the P&A screen
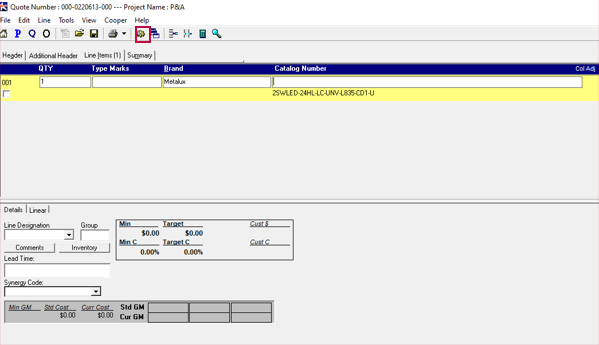
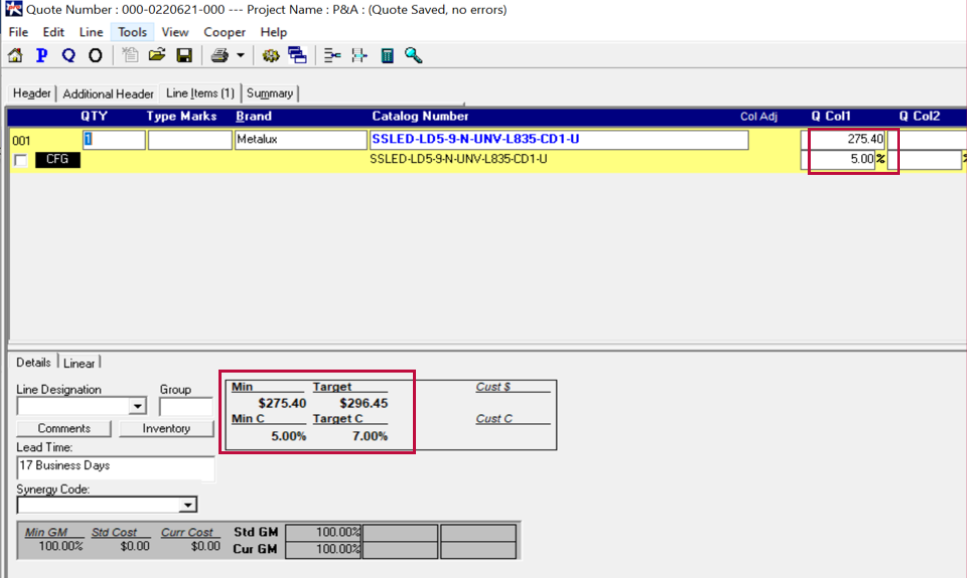
Step 1: Open any sales instrument and click on the Configurator icon.
Configurator from Projects, Quotes and Orders
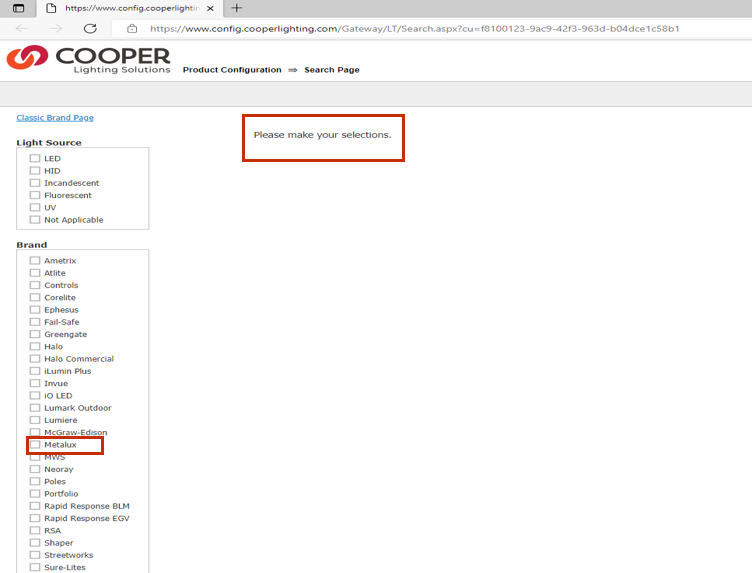
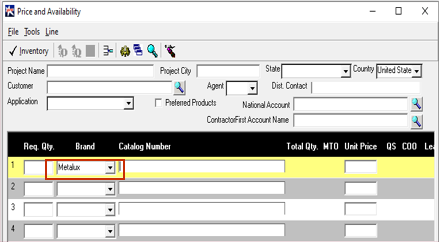
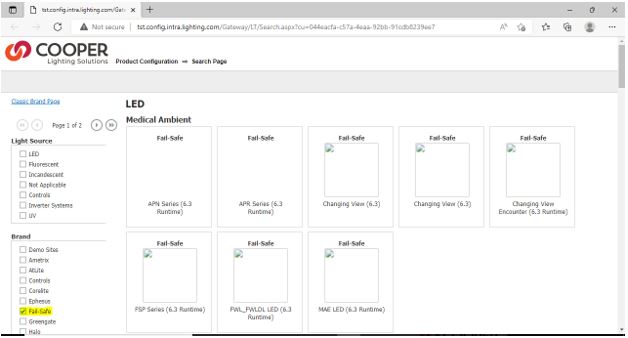
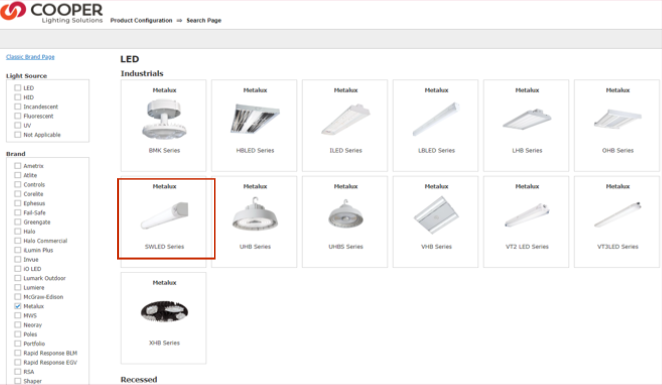
Step 2: Select a Brand in the Cincom page
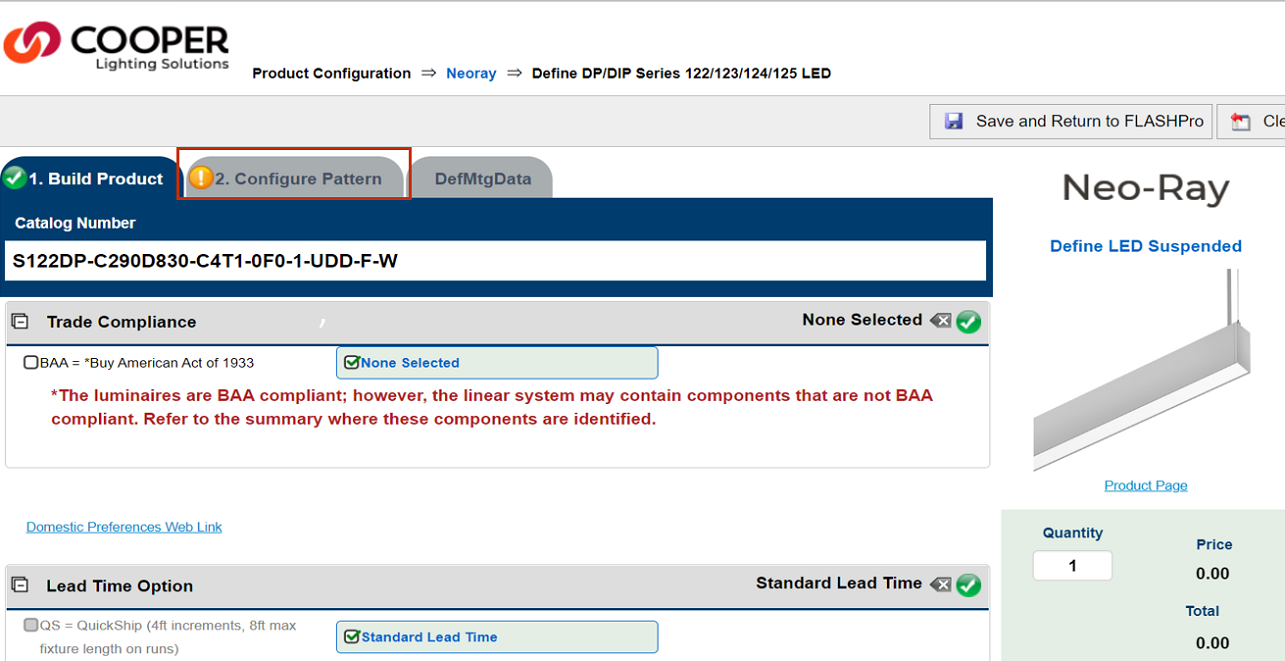
Step 3: Select a product series under the brand.
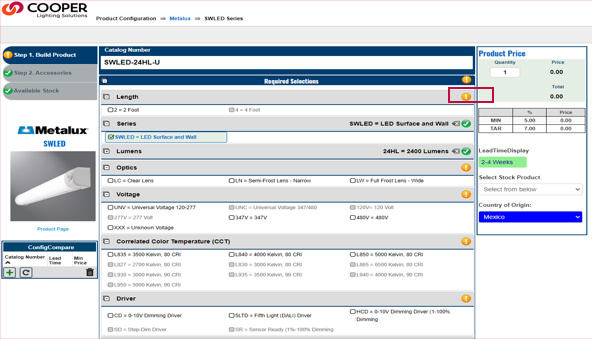
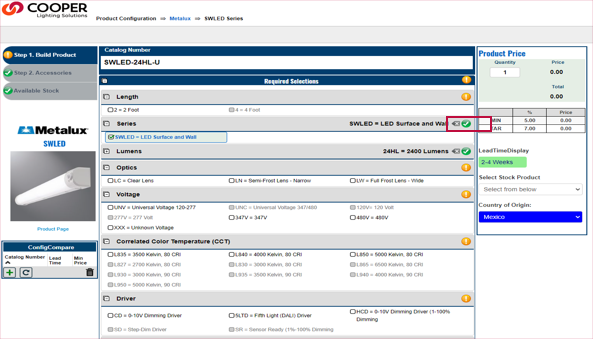
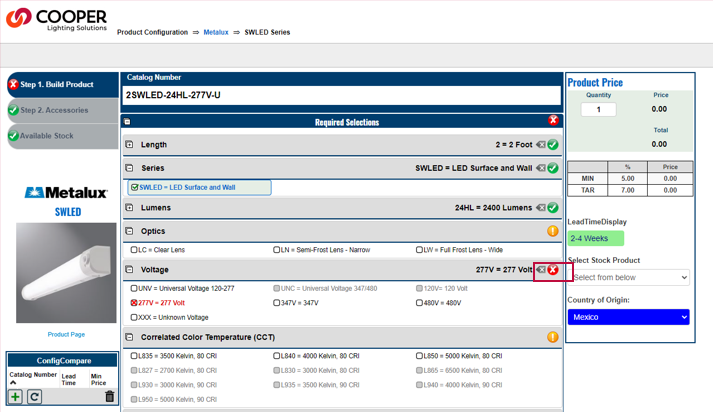
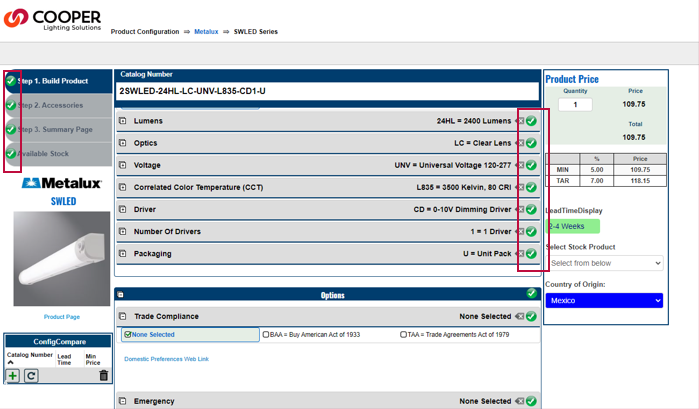
Step 4: Select the component specifications you want for the product.
Components that still require a selection will have a yellow exclamation mark
Components that have been selected will have a green checkmark
If the selection is not valid for some reason (for eg, if it is not valid if selected along with another component - in this case, the
option is usually greyed out) it is marked as a red cross.
Your product will be considered complete and valid only if all your components have a green checkmark. You will only see a price once your
configuration is complete and valid. You will also have an indicator at the top, on the tab, when your product has a complete and valid
configuration. Only then can you save and return to Flash.
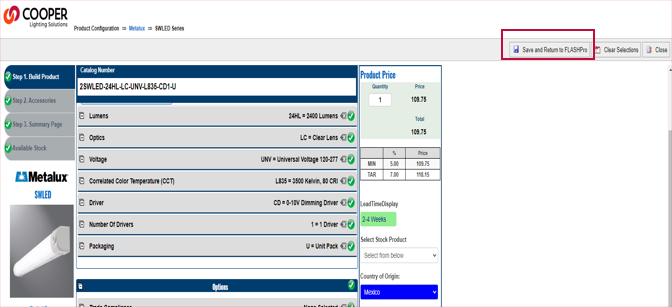
Step 5: Click on 'Save and Return to FlashPro' on the top right corner of the Configurator. It is right above the price section
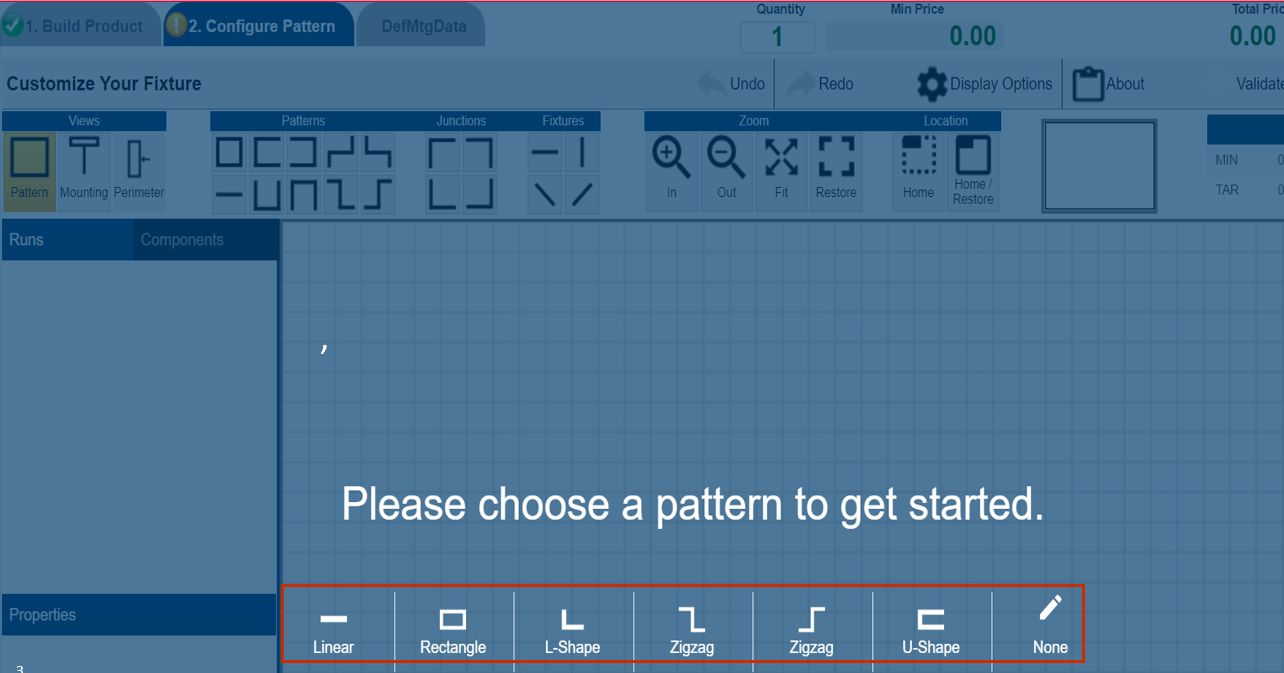
Configuring a Run or Pattern
Configure "Pattern" is a function that is available for the architectural brands, Neoray and Corelite.
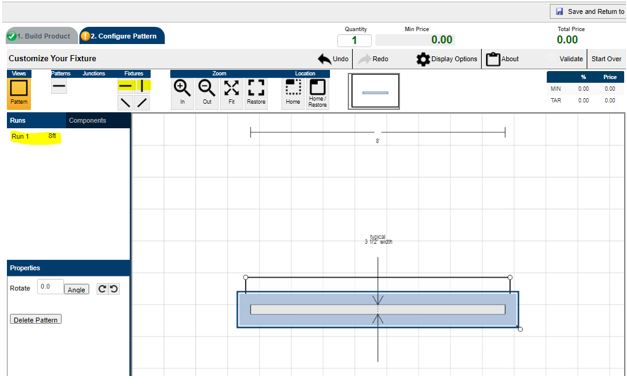
Step 1: After making all selections, select the "Run/Pattern" option under the 'Length' section.
Step 2:New tab 'Configure Pattern' will appear. (Configure Pattern allows to create a layout for Run or Pattern). Eg: Corelite -
Hugo. After selecting Run/Pattern, a new tab appears at the top 'Configure Pattern'
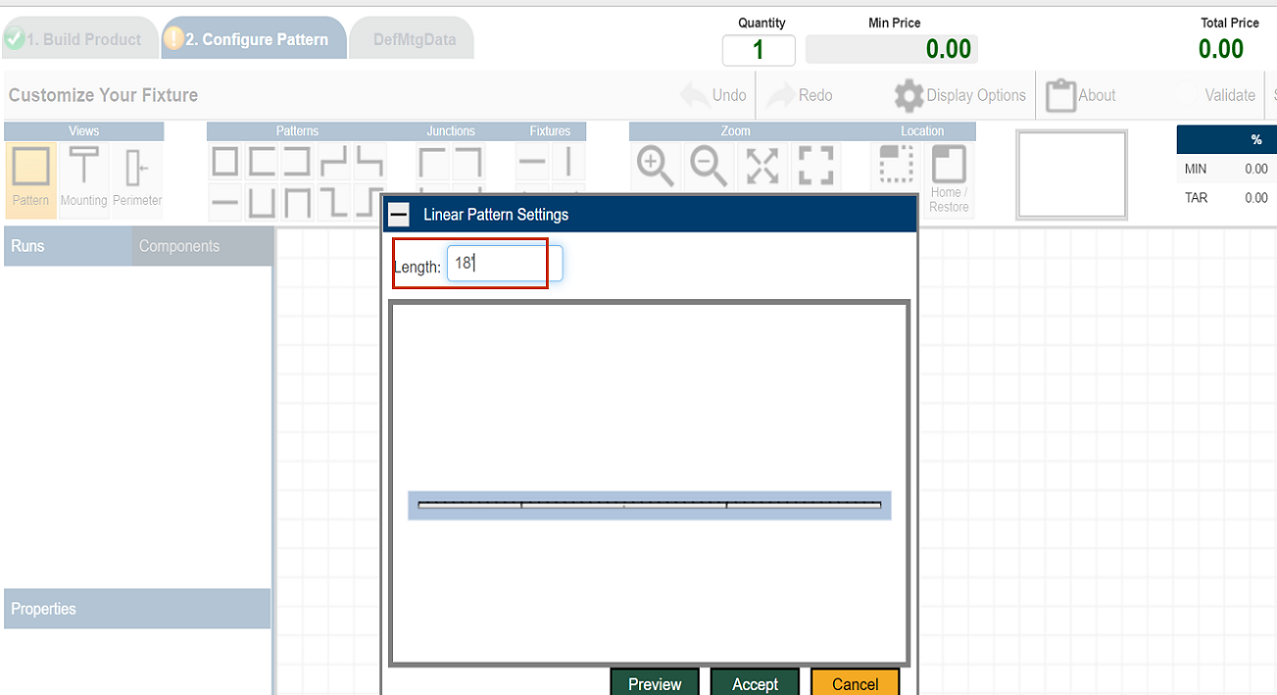
Step 3: Click on the Configure Pattern tab and click the "Linear" option in the blue screen or under the Pattern Category.
Step 4: A popup box appears where we can change the desired Run length. (Length can be in ft and inches, inches and decimal, just
inches, mm or cm)
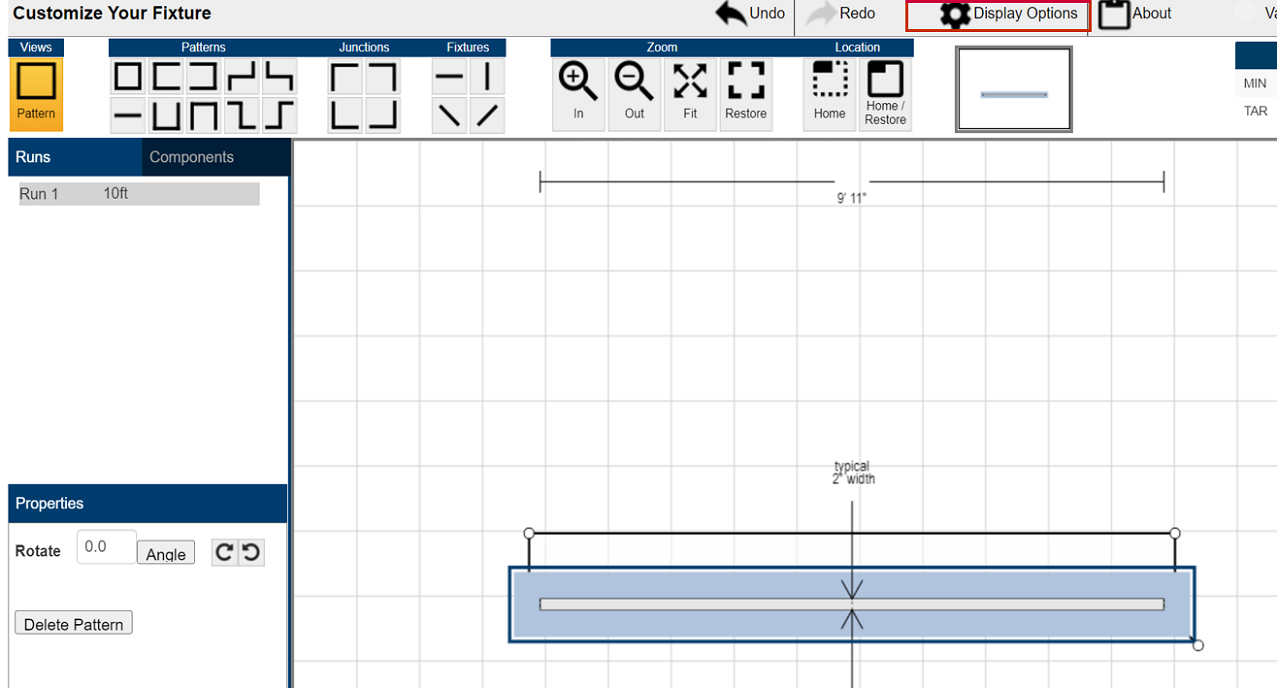
Step 5: Click on Preview and Accept, and select the canvas to drop the Run on to the screen. (Actual Run length dimensions are
visible)
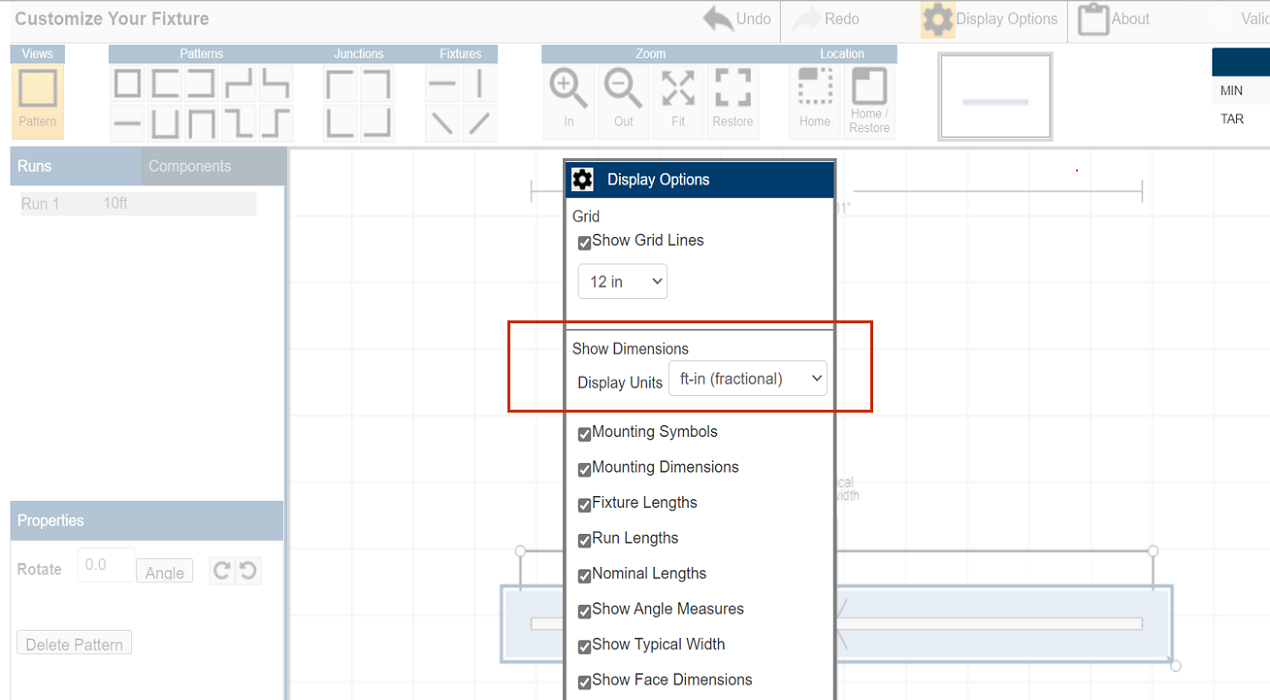
Step 6: To change the unit of measure displayed on the dimensional line, click "Display Options" and select option under Units dropdown.
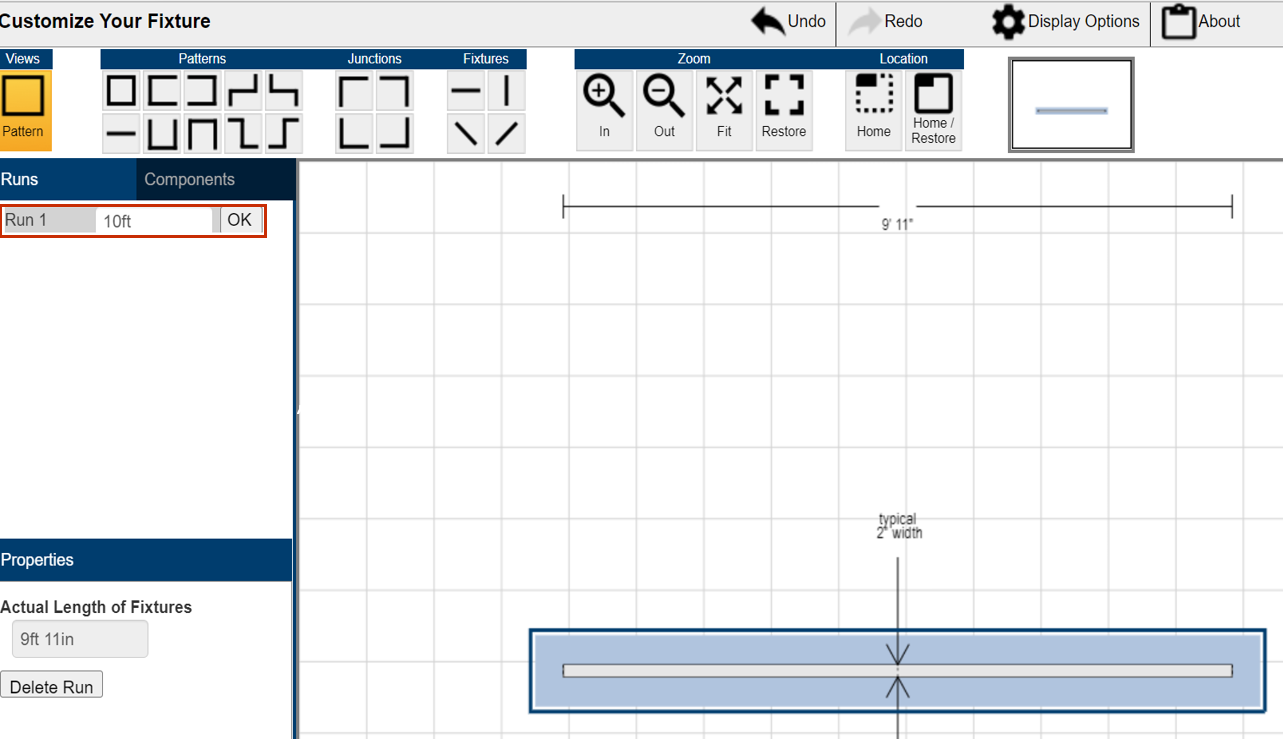
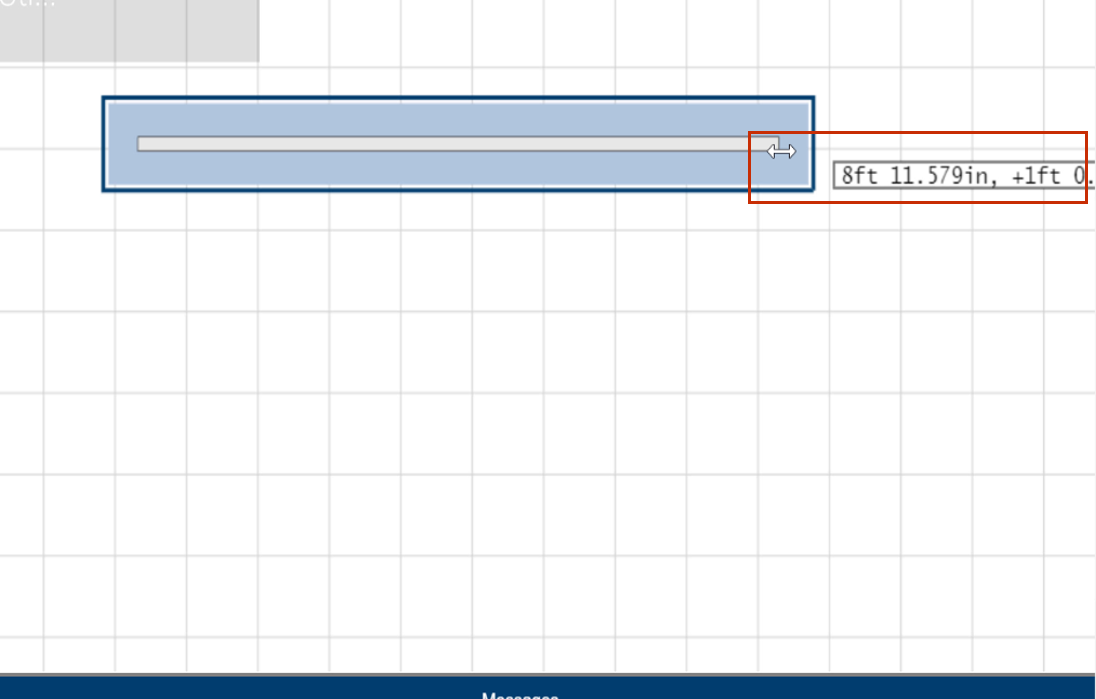
Step 7: To change the Run length, select the Run and on the left side of the screen click on the text box to change the length or drag
one end of the Pattern to change the Run length.
Step 8: To re-size the segment, click on the new segment on the left side of the screen and change the length by using the text box or
by dragging the end of the corner.
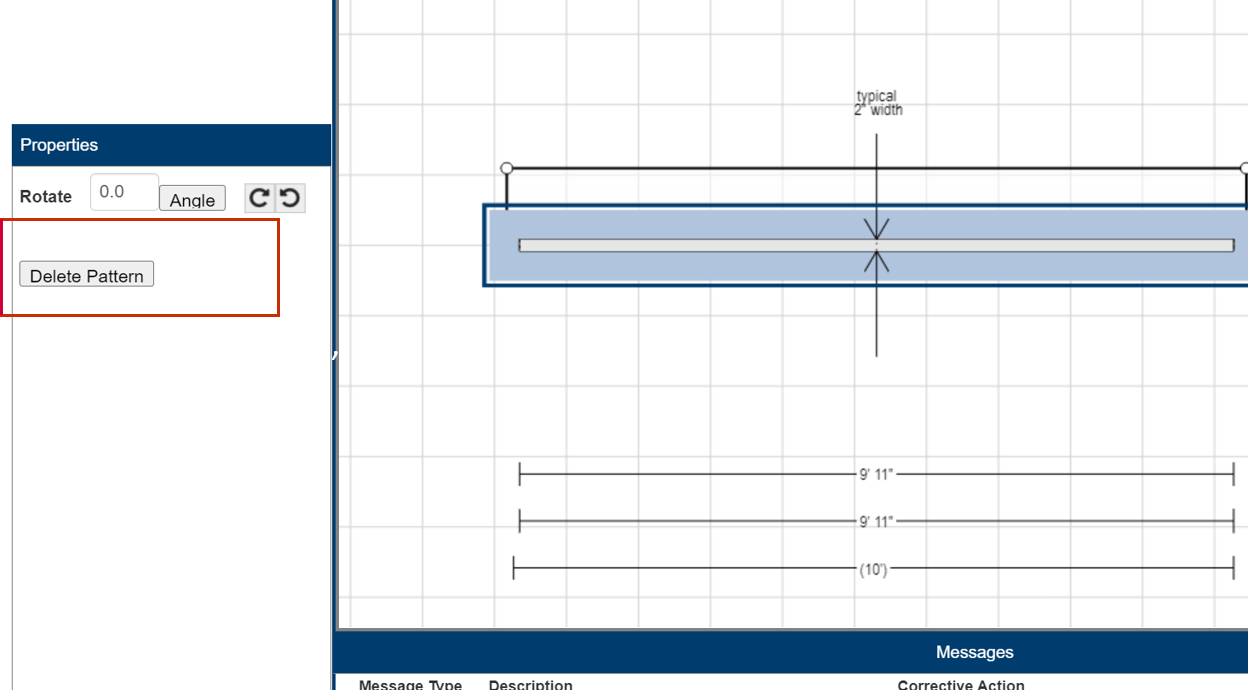
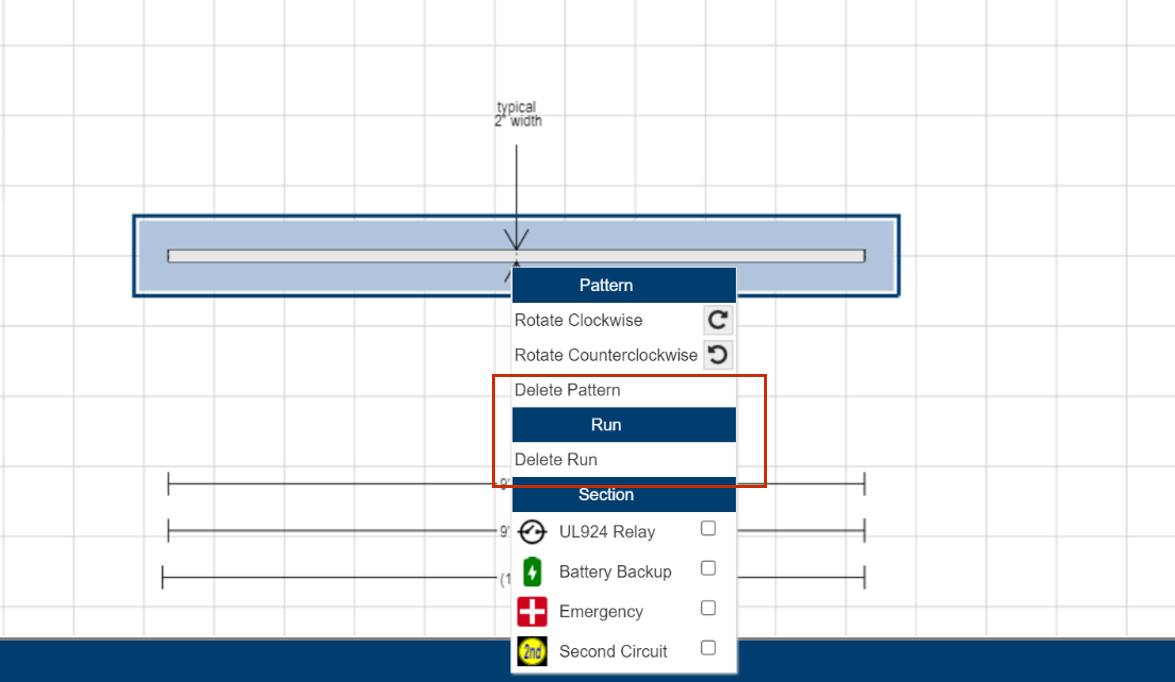
Step 9: To delete a pattern, right click on the fixture and click on the Delete Pattern.
Step 10: To delete the Run, right click on the fixture and click on Delete run.
Step 11: To add Battery backup or Emergency Circuit, right click on the fixture and select the required property.
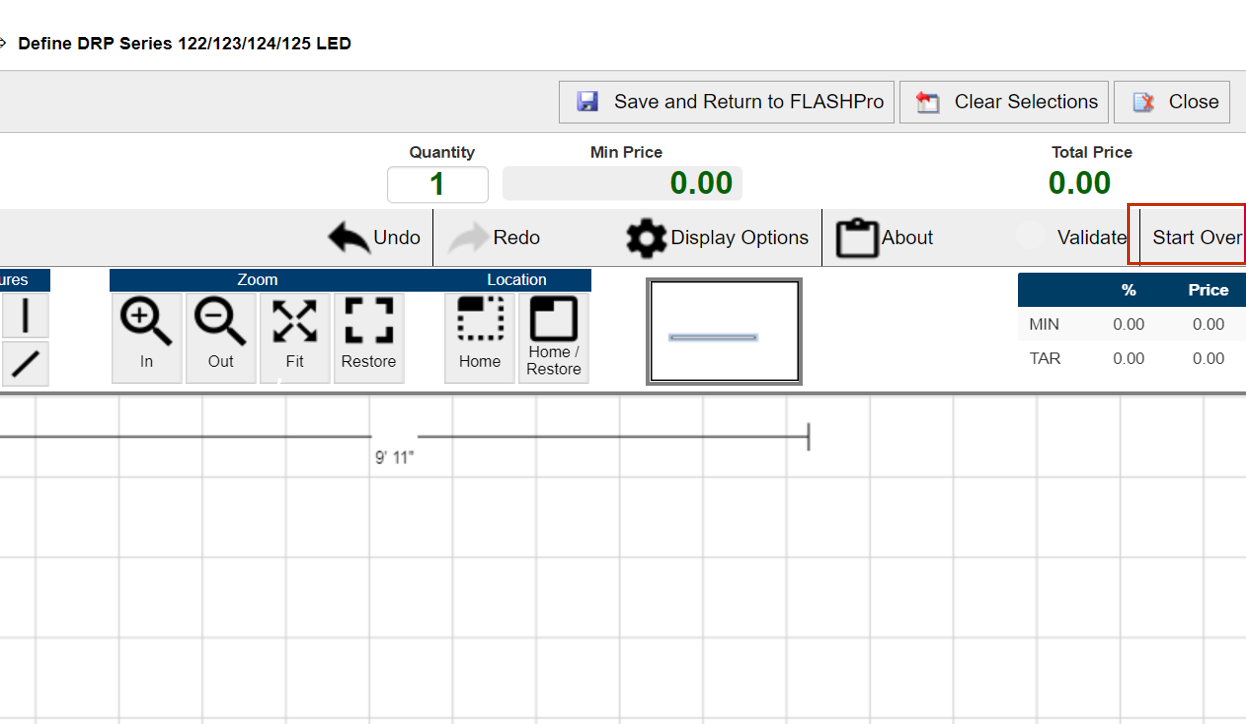
Step 12: To start over with the pattern, click on the Start Over button on the upper right side of the screen and click on ok to
confirm. Select any new Pattern or click on None to get back to the Canvas.
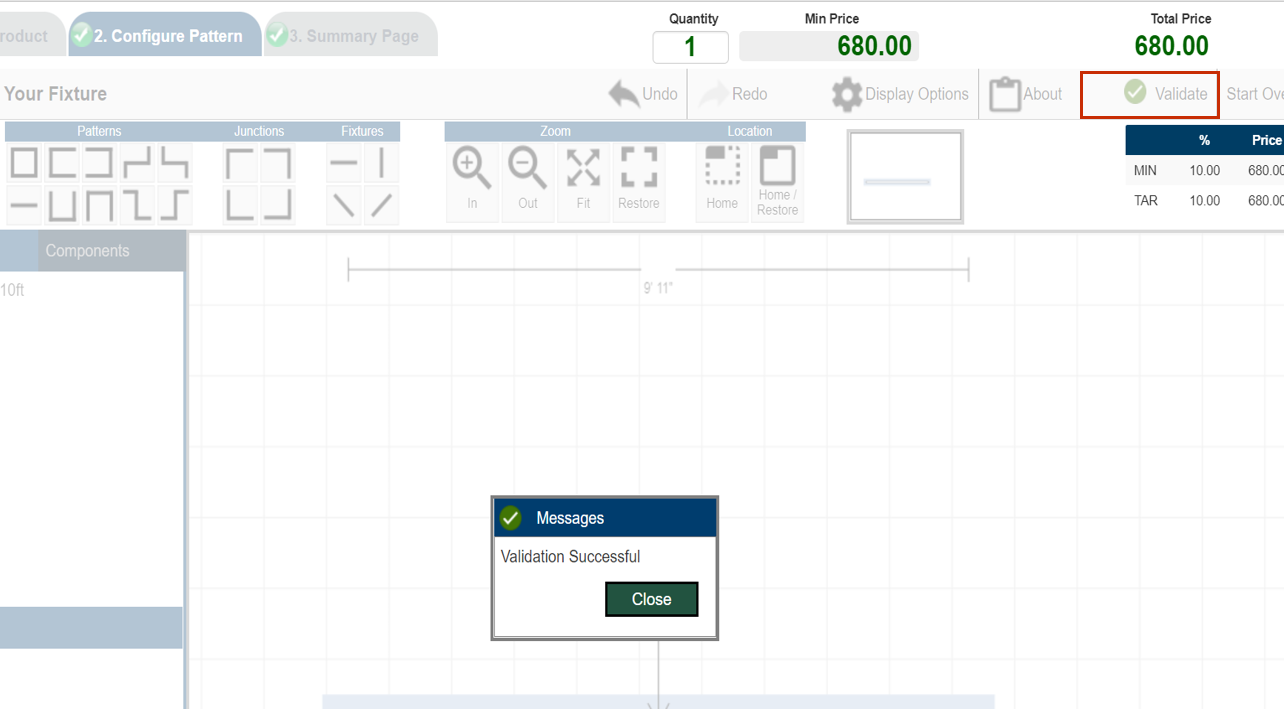
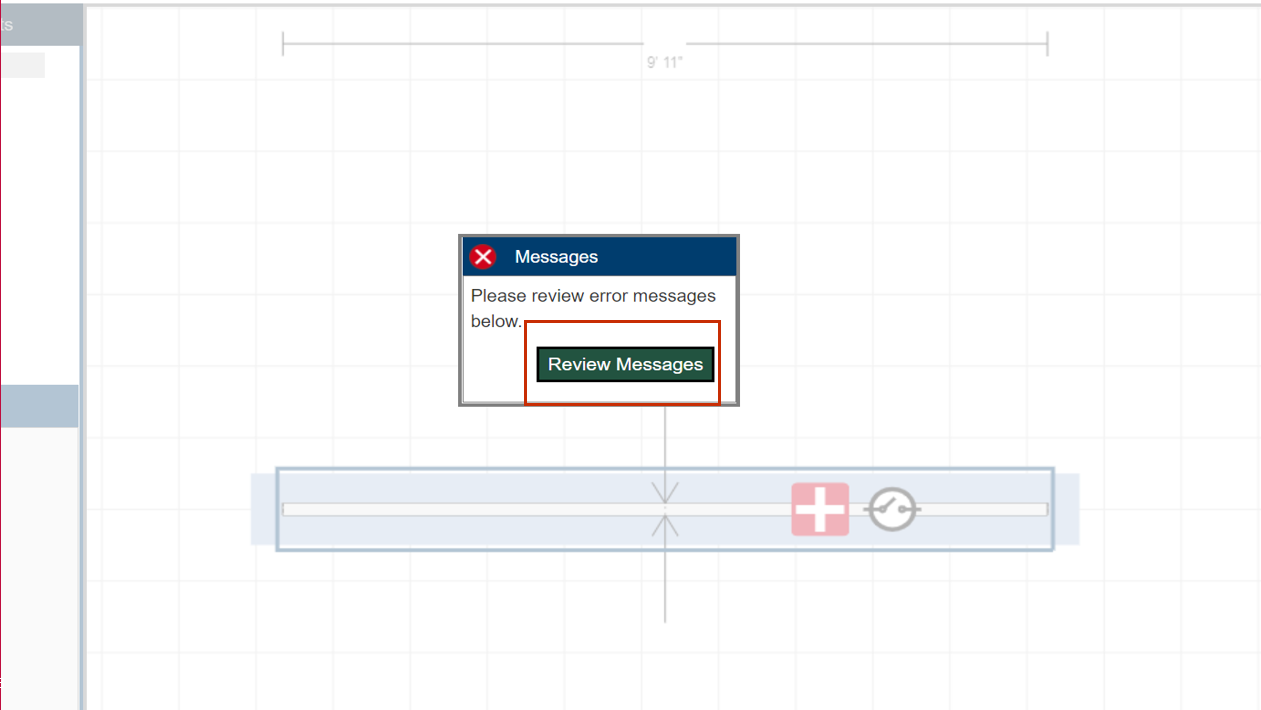
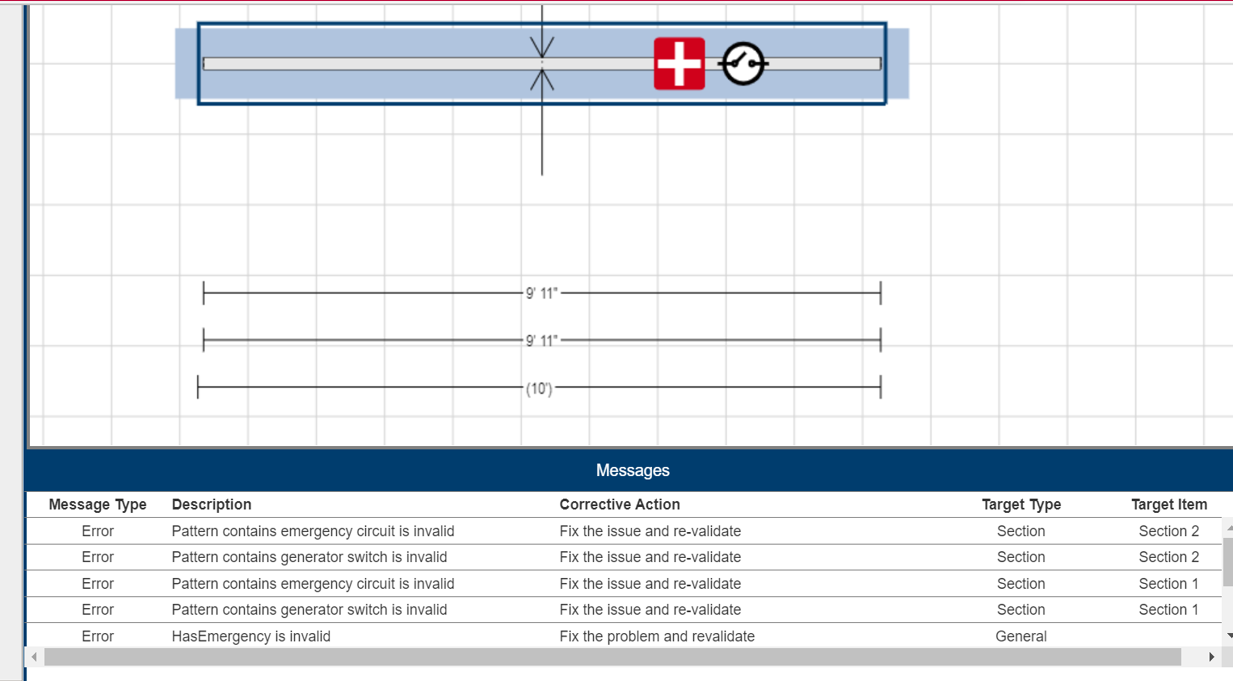
Step 13: Click on the Validate Button on the right side of the screen to confirm there are no conflicts with the configured
Pattern. If there are any conflicts, error popup appears and the error description will be present at the bottom of the screen. For example, if
any battery backup selected on the Build Product but not placed in the Pattern.
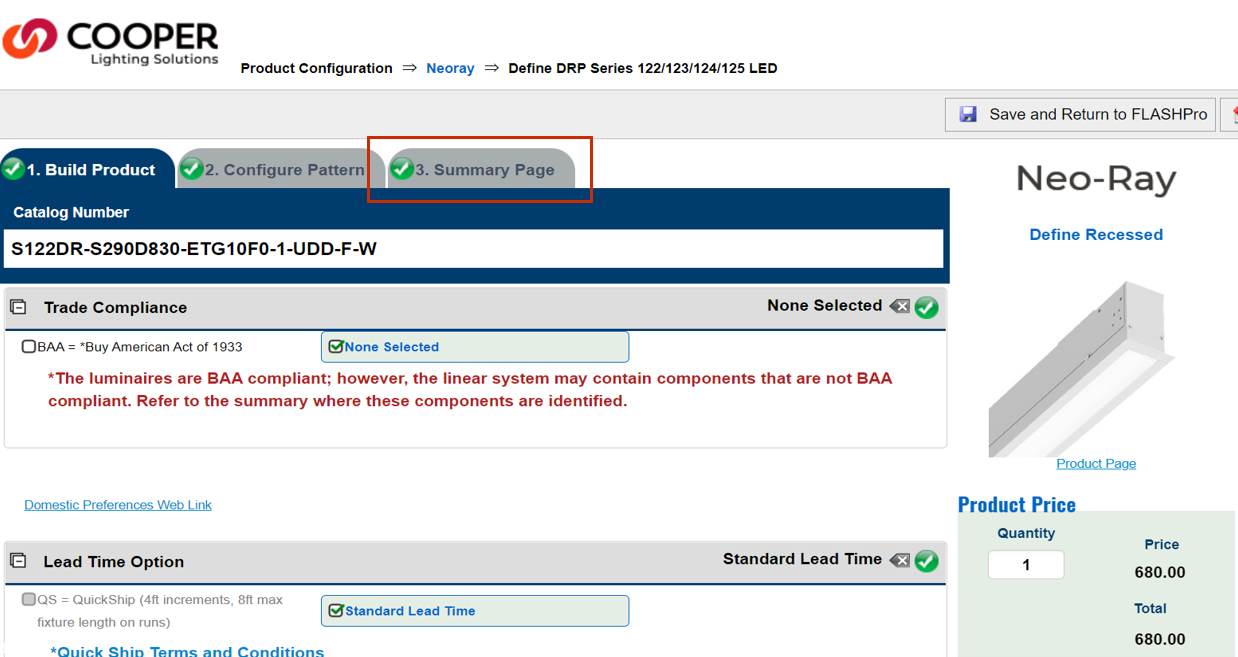
Step 14: Once the validation is successful, will be able to move to Summary Page.
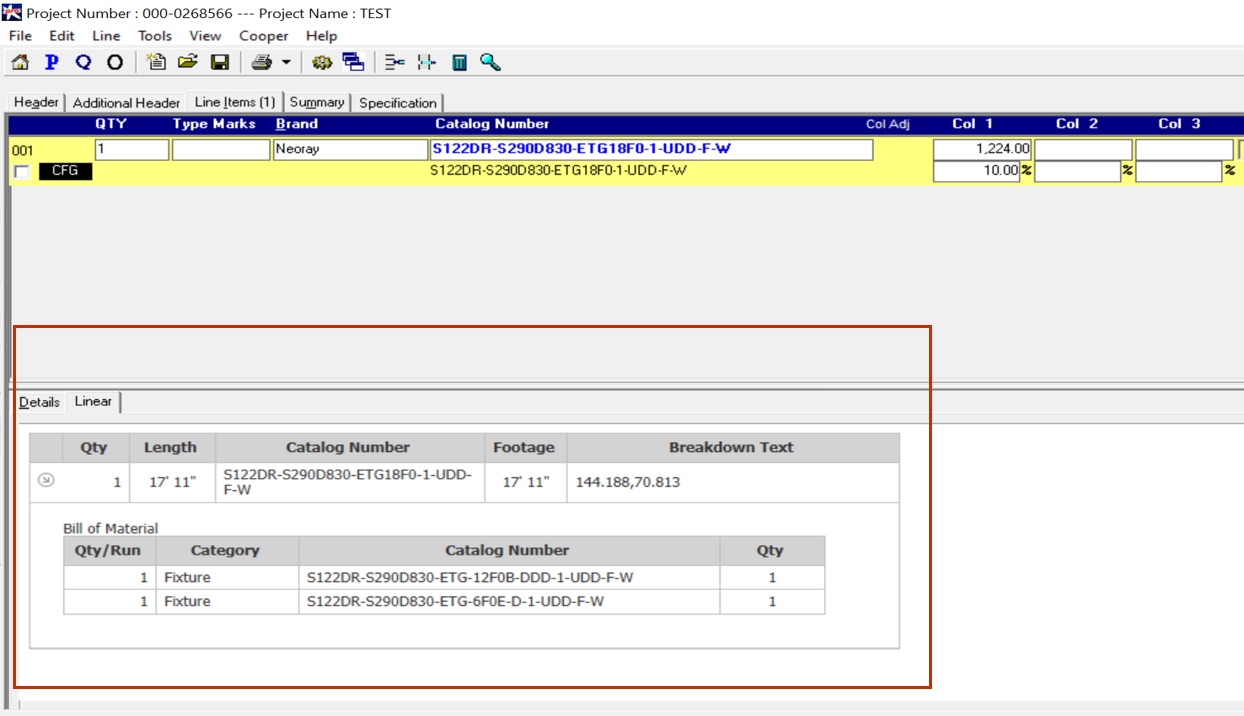
Step 15: Summary page will show the Ordering Catalogue logic and build material with individual fixture for Review. After reviewing, if any changes are required, click the Back button and make changes. If any changes are made, then need
to validate the pattern again to come back to summary page. To Print or save the Configuration, click the Print button.
Step 16: Click the "Save and Return" button to return your configuration to FlashPro